I have to admit I really didn’t like the way our cake looked, but when you don’t see it until your wedding day what are you supposed to do? Send it back? Oh well, the cake was definitely not at the top of my priority list. Has any guest ever left a wedding saying they had a terrible time because the cake was not cute? Geez, I sure hope not.
At least it tasted good (I think) I actually didn’t even have any, and apparently I told my husband not to fill up on cake either because there were so many other better desserts in the dessert room (he is still mad about that…oops). We put the top of he cake in my in-laws’ freezer and forgot to eat it on our one year anniversary. We’re going to try it for our second. How gross do you think it will be two years later?
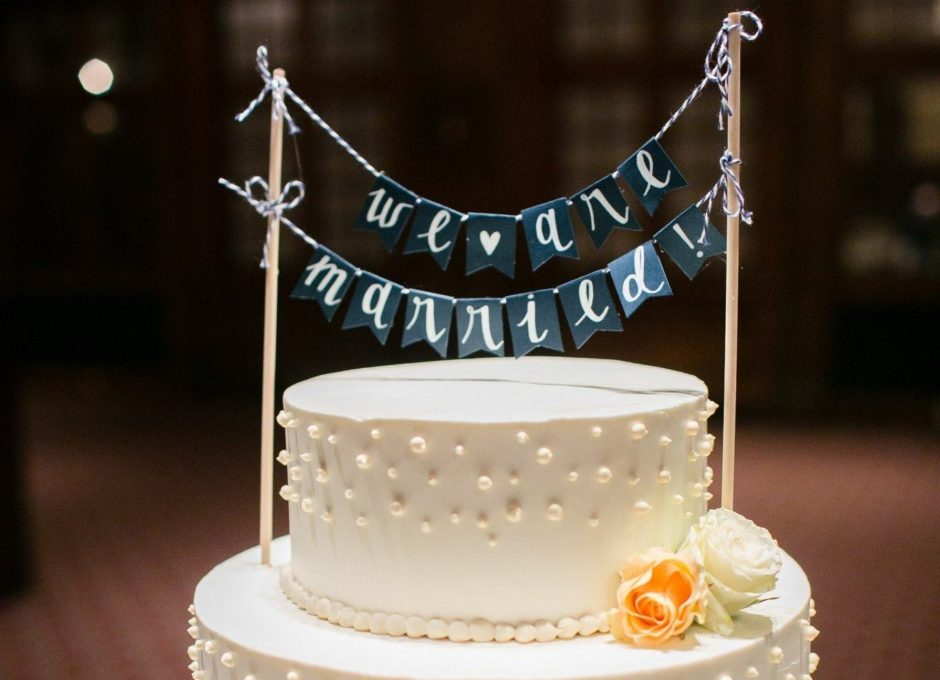
Anywhooo… I DID like the banner cake topper I made. It was so incredibly easy and cost me almost zero dollars. We picked “WE ARE…married” because my husband and I (along with at least 100 people at our wedding) were Penn Staters.
MATERIALS
-Two 12″ wooden dowels
-Baker’s twine
-Cardstock
-Scissors
-Pencil
-Calligraphy marker (if you are using a dark cardstock you will need white or a silver or gold metallic)
-Double-sided tape
-Hot glue gun
PROCEDURE
STEP 1:
Decide on your slogan. Some examples “Just Married” “I do” “Mr + Mrs Whatever” “Best Day Ever” or something more specific to your theme. Message me, and maybe I can help you come up with something creative.
STEP 2:
You will need a little flag for each letter and for any spaces or punctuation, so count to determine how many you will need.
STEP 3:
Next decide how large you want each flag. If you are doing something like “I Do” you will probably want them to be larger and if you are doing something like your new last name and it’s really long you will need the letters to be very small (if that is the case, you may want to think of a slogan that doesn’t have your last name… maybe just Mr. + Mrs.) I wanted my flags to be about 1″ wide and 1.5″ long so I cut my card stock into 14 little rectangles that were double the length (1″x3″) I also made a few extra in case I messed up.
STEP 4:
Fold each of the little rectangles in half “hamburger style” so they look like the size you will use for your final cake topper. You could also cut the bottoms to make the flags a different shape.
STEP 5:
If you are going to hand-letter them, use a pencil to lightly write your letters (one letter per flag) and then go over them with your marker to finalize.
STEP 6:
Arrange your folded letter flags on a table to spell out your slogan. Space them out the way you want them and decide if you need one row or two. This will help you figure out how much string you need. Make the string a little bit longer so you can tie a knot around both dowels.
**here is the tricky part: you probably don’t want your dowels to be arranged parallel to each other, like mine was^^ (another reason I didn’t like how the cake looked). They were supposed to stick them in the top tier of the cake with the bottoms of the dowels closer together and further apart at the top like it was for my son’s first birthday cake. Lay out the string and the dowels and the letters exactly how you want them to look when they are sticking out of your cake. If you don’t do this your rows will hang funny.
STEP 7:
Tie your string(s) to the dowels. Secure with a small amount of hot glue so they don’t slide down the dowel.
STEP 8:
Attach your folded flags to your string by putting them over the string so they hang like a little tent.
STEP 9:
Use double-sided tape or a glue stick to attach the flags at the bottom so the fold is closed. Mine did not slide around the string, but if yours do you can put a tiny dab of hot glue on the inside of each fold where the flags touch the string.
STEP 10:
With additional pieces of baker’s twine, make 2-4 little bows. Use a small amount of hot glue to attach to the dowels so they cover each of your knots.
MORE
Make a small round cake to act as your top tier and stick your topper in it to make sure it hangs the way you want. Take a photograph of it to give to your wedding day coordinator, cake maker, florist or whoever is responsible for sticking it in the cake.
I also thought about adding little felt flowers or embellishments to the dowels.
Fabric, felt or burlap are also good options if you didn’t like the look of paper.
You can make your banner reversible and have the same or different message on the backside of the flags.
If calligraphy isn’t really your thing, try alphabet stamps, stencils, or scrapbook stickers. You could also use the chalk transfer method with a font from the computer.