
This year was the first year Teddy got to pick his own birthday party theme and he told us he wanted a Robot party. He was really into reading Robosauce by Adam Rubin and Daniel Salmieri so I used that as inspiration. Teddy had a few requests; a robot cake, a robot pinata, a robot costume, and most importantly that he got to wear a tie to his birthday party. So, that is exactly what he got!
The problem that I always have with party planning is I get a very specific idea in my head of what I want the party to look like. Then I find out that the decorations and other party items I'm picturing don't actually exist in real life and if they do they are super expensive. Every robot themed decoration I could find in stores was brightly colored and cartoony. I was picturing all silver and metallics with not-so-cheesy robots. So thanks to my stubbornness and unwavering creative vision I doomed myself to weeks of late night DIYing and hours watching Cricut tutorials.
The good news is...if you have your heart set on a not cheesy silver robot party, hopefully I've made it a little bit easier for you. I'm sharing all of my ideas, activities and tutorials so you can spend more time with your little birthday kid and less time stressing!

This post contains affiliated links for your convenience. I only write about products I love and all thoughts and opinions expressed are my own. For more information see Legal.
ROBOT PARTY DECORATIONS
First off let me point out that I am well aware I went a little bit overboard with my Cricut for this party. Truth be told, I asked for a Cricut Explore Air 2 for Christmas but had no idea what I would use it for or even what it could do. I finally opened the box and in the span of a week I used it to make banners, stickers, temporary tattoos, scratchboards, labels and a cake topper. So yea, I'm pretty jazzed about my Cricut machine.
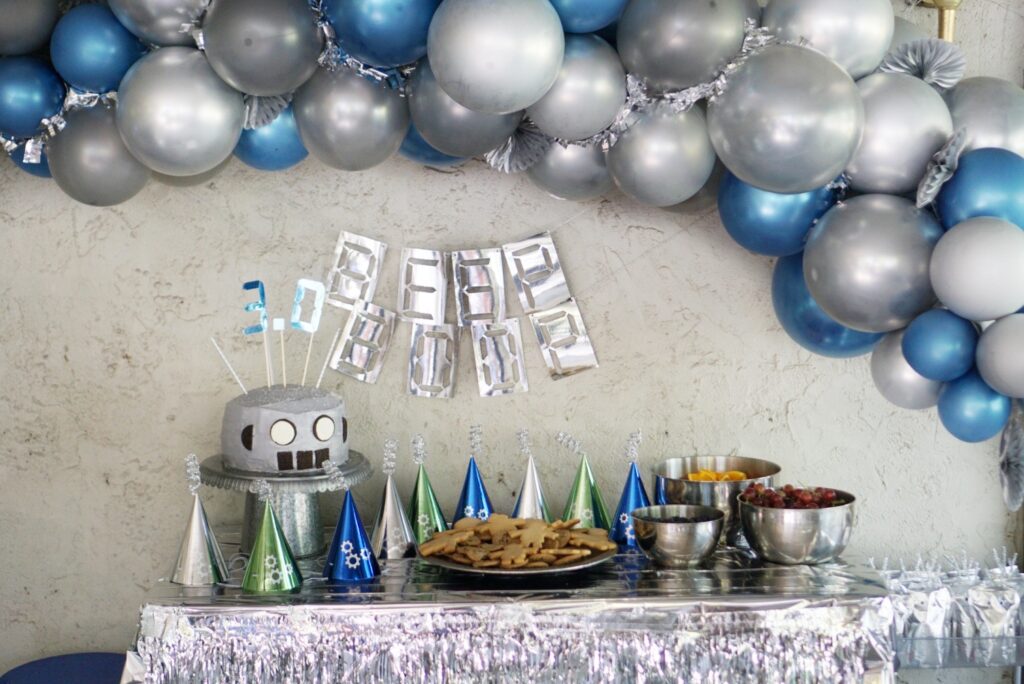
Because I wanted an all metallic look for decorations, I collected all of my metal bowls, utensils, foil pans, metal baskets, metal shelves from all over the house. I used this metallic silver cardstock for all of my banners and labels and I used a ton of silver emergency thermal blankets in my decorating. The blankets made great tablecloths, tinsel and piñata fringe.

PARTY HATS
Why was it so hard to find silver party hats?? I had to buy an assorted metallic mix and take out the colors that I didn't want. Then I added some silver gear stickers that I made on silver Cricut vinyl and some curly cue silver pipe cleaners.
BANNER + BALLOON GARLAND
The BEEP BOOP Banner was so easy to do on the Cricut that I'll be making a lot more banners in my future. I was going to make the banners out of just the letters but because of the style of font the letters wouldn't hold together on their own so I cut them out of a rectangle instead. You can use any shape, layer any text on top of it then group and slice, then delete the text. There are a million banner-making youtube tutorials if you need them.
This was my first attempt at making a balloon garland but thanks to this amazing little invention called Balloon Garland Tape and the powerful lungs of my sister and husband this garland turned out amazing! I bought two colors of silver and blue metallic balloons and had my helpers blow them up in all different sizes. Then you just stick the knot into these tiny little holes along the clear piece of tape, alternating the sides to create a bunching effect. To add more visual interest, I used some silver tinsel left over from the piñata and some silver paper fans.
ROBOT PARTY FOOD MENU
ROBOT FOOD + SNACKS

- Pizzas (from Costco) I cut one pizza into a square and made a pepperoni robot face just for fun and left the rest like regular pizzas.
- Robot Sunbutter and Jelly Sandwiches ( Robot Sandwich Stamp)
- Robot Sugar Cookies (Robot cookie cutter here)
- Potato Salad
- Mac and Cheese
- Cheese, Keilbasa and Crackers
- Hummus, Mini Naan and Olives
- Fruit (orange slices, blueberries and grapes)


ROBOT PARTY DRINKS

- Robot Transfusions: Grape juice, Gingerale, Vodka
- Robo-sauce: Orange Tropical V8 Juice
- h2o: Water (duh)
- Beer, soda, spiked seltzers
- Robot Juice Pouches


HOW TO MAKE ROBOT JUICE POUCHES
On Pinterest I saw robot parties where they wrapped juice boxes in aluminum foil to turn them into robots and I thought "cute, but that's so much extra work when juice pouches are already silver on one side!" I think my robot juice pouches turned out just as cute, but if you feel like gift wrapping tiny juice boxes in foil don't let me be the one to stop you!
Choose any juice pouch with a silver backside, we chose Honest Kids juice pouches. Unstick the straw from the back and tape to the front side with silver washi tape. Hot glue googley eyes above the printed barcode/expiration date so it resembles the mouth if possible. Then add V-shaped silver pipe cleaner to the top and you've got yourself little robot juices. This was probably the cheesiest I got with the robot theme, but it was too cute not too.

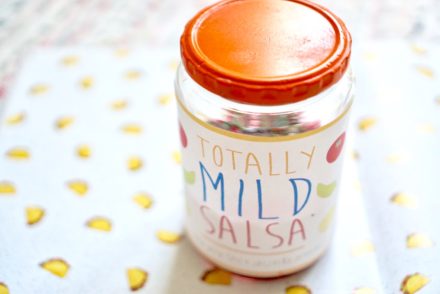
SIGNATURE DRINK
A favorite mixed drink of our friend group is a Transfusion. I thought the name sounded kinda robot-y and I had a whole lot of Gingerale left over from another party so it seemed like a no-brainer.
This Transfusion recipe label was probably my favorite thing I've made on my Cricut...definitely not the best use of my time, but I don't think this will be the last time I waste my time making a custom label for a signature drink at a party.
ROBOT CAKE + CAKE TOPPER

This cake turned out so much better than I had expected. I used two funfetti box cakes which baked a total of 4 9-inch round cakes. Then I cut the rounded tops off of three of the cakes so they could stack nicely with vanilla frosting in between. I mixed one drop of black and blue gel food coloring to get a silvery color for the outside layer. The eyes were Oreos with one of the cookie sides removed. I cut the leftover Oreos into rectangles for the teeth and in half for the ears.
The cake topper was another one of my Cricut projects. I cut out a '3.0' using a digital style font from blue metallic cardstock. Then, I glued it to another layer of the cardstock so it would be thicker and hold together the pieces of each letter (the digital font is made up of dashes that don't connect). It was way more difficult than it should have been. I should have welded together the dashes in Cricut Design Space before printing but you live and you learn. To finish, I hot glued the 3.0 to three pieces of bamboo skewer and then added some long silver candles.

ROBOT PARTY ACTIVITIES
ROBOT SCRATCH ART CRAFT

I was so proud of myself when this scratch art robot DIY actually turned out the way I had hoped. It is hard to find a party craft that is simple enough that it doesn't require help from a grown-up, but also doesn't make a mess. Scratch art was always one of my go-to projects in the classroom so I thought scratch art would be perfect for the party! Unfortunately the robot scratch art papers that I found didn't have Prime shipping and wouldn't have gotten there before the party and they print them on really thin paper which are easily ripped by little kids.
I've made my own scratch paper with my art students before, so with a little creative problem I figured out how to make scratch boards cut out into different shapes.

Here you can check out the full tutorial on how to make DIY SCRATCH ART WITH CRICUT (coming soon).
ROBOT TEMPORARY TATTOOS
I saw these really cute temporary robot tattoos from Meri Meri but they would have been a splurge. To save money I bought some Silhoutte temporary tattoo paper and made my own with the Cricut.
To be honest they were a bit of a flop. The temporary tattoo paper was really difficult. It was silver tattoo foil on a white backing and then it had a protective plastic layer on top. When you cut out the image you then need to remove every little piece where you want the foil to transfer. The robot SVG files I bought were too intricate for tattoos and I spent wayyy too long picking out the tiny pieces. Then there is no way I could find to cover the sticky tattoo part without ruining them. The tattoos would have been great for one or two kids but for an entire party of kids crowding around it was a little tedious.
**I didn't get any real photos of the tattoos but you can see one on Teddy's arm in the scratch art picture above!
ROBOT PINATA

I started out having grand plans of making my own piñata and having Teddy and I sit down and papier mache together. Then reality sunk in that I had two days left before the party and had a lot of things more important than making a piñata. I was inspired by these Meri Meri robot favors, but I needed something bigger so I bought a cheesy-looking robot piñata and I covered it with silver fringe. So much easier (and less messy) than making my own from scratch.
Check out full tutorial here to see how I made the silver fringe: EASY DIY ROBOT PINATA (coming soon)
ROBOT TOYS + BOOKS

I collected all of our robot-ish toys (transformers, Tinker Robots, Tegu Magnet Blocks, Rock 'em Sock 'em Robots, and expandable ball) and put them out in a basket on a rug under a tent. It was a great spot for the younger kids and babies to play in the shade. I also included some robot books, because you know how much I love books. They didn't get much love at the party, but its the thought that counts right?
Check out my list of BEST ROBOT BOOKS FOR KIDS (coming soon).
ROBOT COSTUMES + PHOTOBOOTH

It is pretty safe to say that the robot costumes were the hit of the party. I made a few helmets and bodies out of cardboard and then put some loose dryer vent pieces for arms and legs. The dryer vents have a wire throughout so both ends of the vent need to be covered with duct tape so no kids get poked. Some dryer vents had sharp metal too, so I made sure to find the lightest weight dryer vent available. The kids could mix and match costumes or just wear one piece if they wanted. The bodies were pretty much kid sized but the helmets could be worn by all.

The costumes were a lot of fun to make. I saved up my Amazon boxes and used a utility knife to cut out the different eye holes and arm holes. Then I finished off the cardboard costumes with silver duct tape along the seams and silver spray paint.
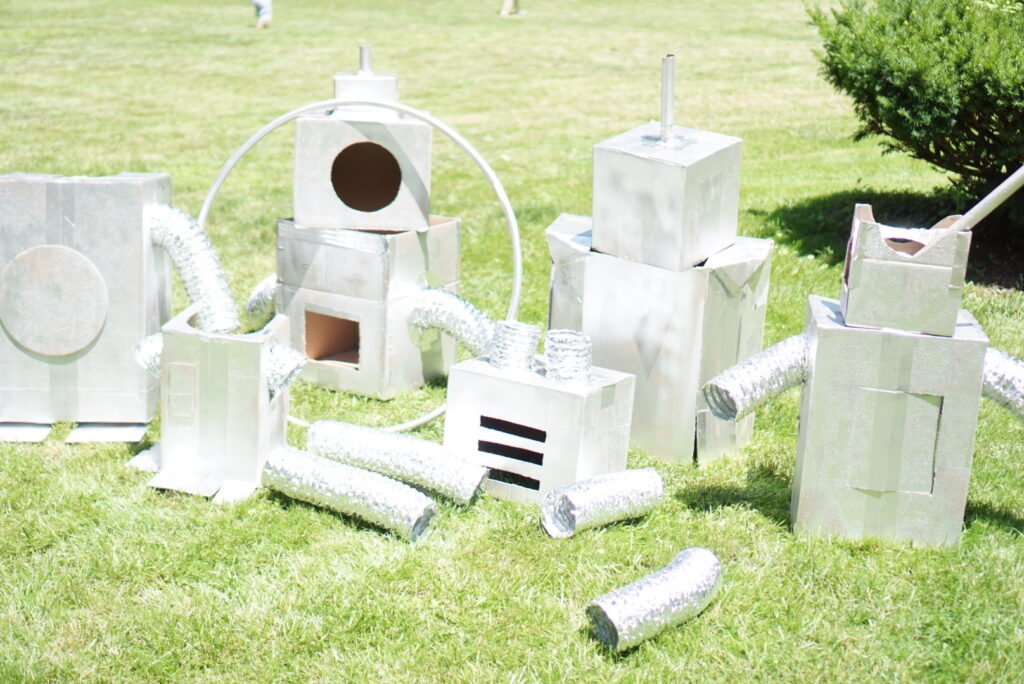
My favorite part was watching the kids (and adults) running around in the yard wearing the robot costumes! I love how the pictures turned out from the photo booth too with the silver tinsel fringe curtain and white sheet background and the mylar disco balls.

We even got a hot mess of a family photo in our robot costumes. Some of us liked the costumes more than others....


BUILD-A-ROBOT PLAYDOUGH KIT FAVORS

I love when a party favor can promote learning and creativity (bonus if it is also inexpensive), so play dough is always a great favor! We decided to combine some silver homemade play dough with some tinker tray objects for a fun open-ended build-a-robot activity in a jar!
Of course with the craziness of setting up for the party I forgot to photograph the favors and their cute Cricut tags before all but one was gone!
Learn more about our Build-a-robot play dough kit party favors here BUILD-A-ROBOT PLAY DOUGH KIT.
ARE YOU PLANNING A ROBOT BIRTHDAY PARTY?
Tag your photos of your robot decorations and activities inspired by us with @ureadyteddy and we'll share our favorites in our instagram stories! If you have any questions, let us know in the comments or shoot us a DM over on instagram!

SHOP THIS POST

I love every single thing about this party! My boys love robots too. I can’t wait to use some of these ideas 🔩